
Quick reference
| Action | How | Why it matters |
|---|---|---|
| Rotate the camera around the mannequin | Hold the middle mouse button | The only way to see the back and sides of a cuff |
| Zoom in | The Z key, or press the middle mouse button | Detail work is invisible at default zoom |
| Duplicate the accessory in hand | Hold Shift while placing | Twenty buttons without twenty trips to the tray |
| Remove a whole run of lace or trim | Click it once, then the X in the box at the top | Cheaper than unpicking pin by pin |
| Full three-axis rotation | Turn on Accessory Rotation Gizmo in Settings | Advanced placement — X, Y and Z, not just the surface |
| Pan and turn the mannequin | WASD to pan, scroll wheel to rotate | Framing while you work |
How trim actually attaches
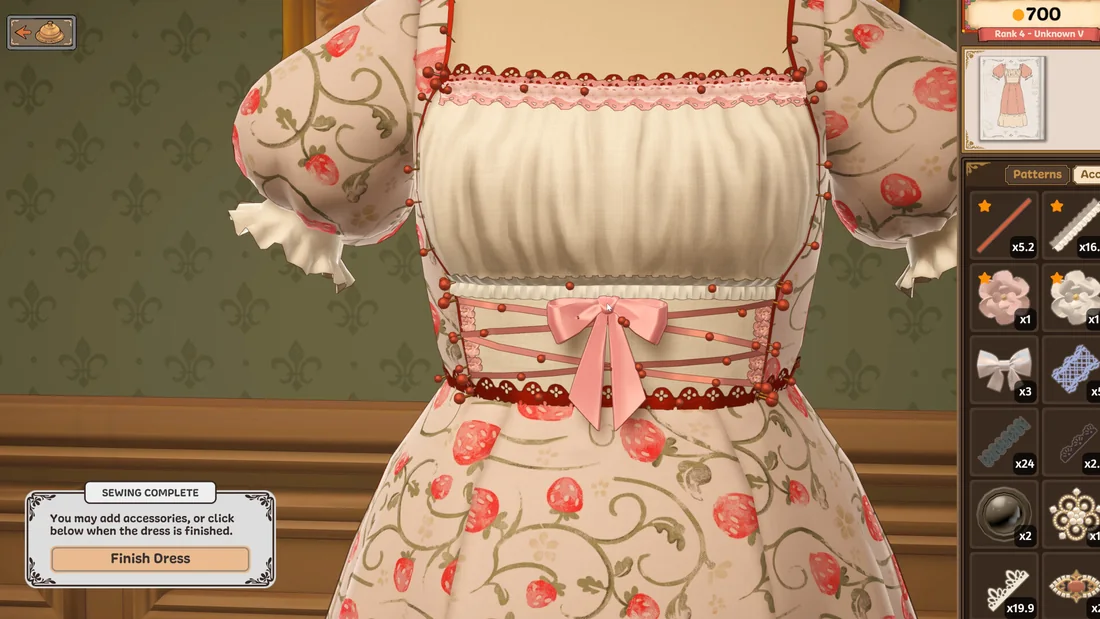
The thing that surprises people is that you never sew the trim. You place it, you pin it, and it goes on by itself at the end of the commission. Once the dress is finished, the pins stop being part of the design and the trim simply sits where you pinned it.
That has one useful consequence: pins are a preview, not a commitment. Clicking back to the fabric tab shows how the dress reads without them, which is the closest thing the game has to stepping back and looking at your work.
Pin in short runs, not long ones
This is the single habit that decides whether your lace follows the dress or fights it.
Dragging a long length of trim across a whole hem in one go is where it goes wrong: the game struggles over every fold and curve it meets, and the run ends up straight where the cloth is not. The fix is to work in short lengths — a few centimetres at a time — and drop a pin at the end of each one. You do not have to re-click to continue; the game carries on from the pin you just placed.
More pins means the trim can bend around the cloth instead of cutting across it. Players who have spent time with it are consistent on this: the more pins, the better the run sits.
Working around a cuff
Cuffs are where most people give up, because you cannot see what you are doing.
The approach that works is to treat a cuff as a whole dress at a smaller scale: zoom right in, then rotate the camera around the cuff as you place each pin, so you see the back and the sides in turn. It is the same motion as trimming a hem, just tighter and slower.
If the sleeves are in your way while you work on something else, take them off. You are not required to keep every part of the dress attached while you decorate it — the parts can go back on afterwards.
When trim goes wonky
There are three failure modes worth knowing, and they have different fixes.
| What you see | What is happening | What to do |
|---|---|---|
| Trim is upside down | The run was drawn in the opposite direction | Drag it the other way — right instead of left — and it reverses |
| Trim clips through the cloth | The run is sitting slightly too proud of the surface | Use the adjustment buttons to tilt it a little |
| Trim is floating above the dress | The raise and lower control is not responding | See the honest note below — this one is widely reported and unresolved |
The upside-down problem catches people out because there is nothing on screen that says "this side up". If a run looks wrong in a way you cannot name, check its direction first.
Adjusting a run after the fact
Nothing about decoration is locked in until you hand the dress over.
Hover the pins at the ends or the middle of a run and the game highlights in yellow the length you have selected. Highlight what you want, click, and start working on it again. Pins you have already placed can be moved.
To delete an entire run rather than reworking it, click the trim once and press the X that appears in the box at the top. That is a whole-run delete, not a single pin.
An honest note on raising and lowering trim
The trim guide this page draws on says the author could not raise or lower trim — that is, push it deeper into the dress or lift it clear of the surface. Players in the comments report the same thing, several of them asking whether it is a bug. One commenter suggests that holding the raise/lower control moves it further than clicking, and that fully raising a run and lowering it again can tidy up a wobbly line.
We are reporting this as unresolved. The developers have not said whether the control is intended to work differently, and we have not tested it ourselves. Treat it as a known rough edge rather than a technique.
Decoration is not a scoring system
It is worth saying plainly: the developers have published no decoration values, no list of what each trim is worth, and no rule about which decoration suits which customer. The store page promises you can "add lace trims and other accessories wherever you like with complete creative freedom" — that is the whole documented system.
Where decoration meets the commission is the brief. Some briefs name attribute targets that trims feed into, and some carry hard rules such as a colour restriction. Read those first; the rest is taste.
Frequently asked questions
Does trim have to be sewn on?
No. Trim is attached automatically when you finish the dress. There is no separate sewing step for it.
Can I move a pin after placing it?
Yes. Pins you have already placed can be moved, and hovering the pins at either end of a run — or in its middle — highlights the length you have selected so you can rework just that part.
Why is my trim floating above the dress?
Many players report that trim sits proud of the surface and that the raise and lower control does not correct it. It is widely described as a bug. We have no official statement either way and are not going to guess.
How many decorations are in the game?
The developers have published totals for dress pieces, fabrics and accessories — over 150 dress pieces, over 450 fabrics and over 350 accessories — but no breakdown of which of those are decorations, and no decoration list. We do not have one to give you.
Where to go next
Decoration is the last stage of the loop. If you are earlier in it, start with how to play Dressmaker, then the Dressmaker sewing tips for grain and seam order, and the Dressmaker wiki for the fabric and pattern reference tables. The money side of a finished dress is on the Dressmaker money guide.